You’re standing in your garage-turned-workshop, clutching a piece of raw leather like it’s part of a medieval armor set—you’ve got dreams of crafting the perfect wallet that’s sleeker than anything you can buy off the shelf.
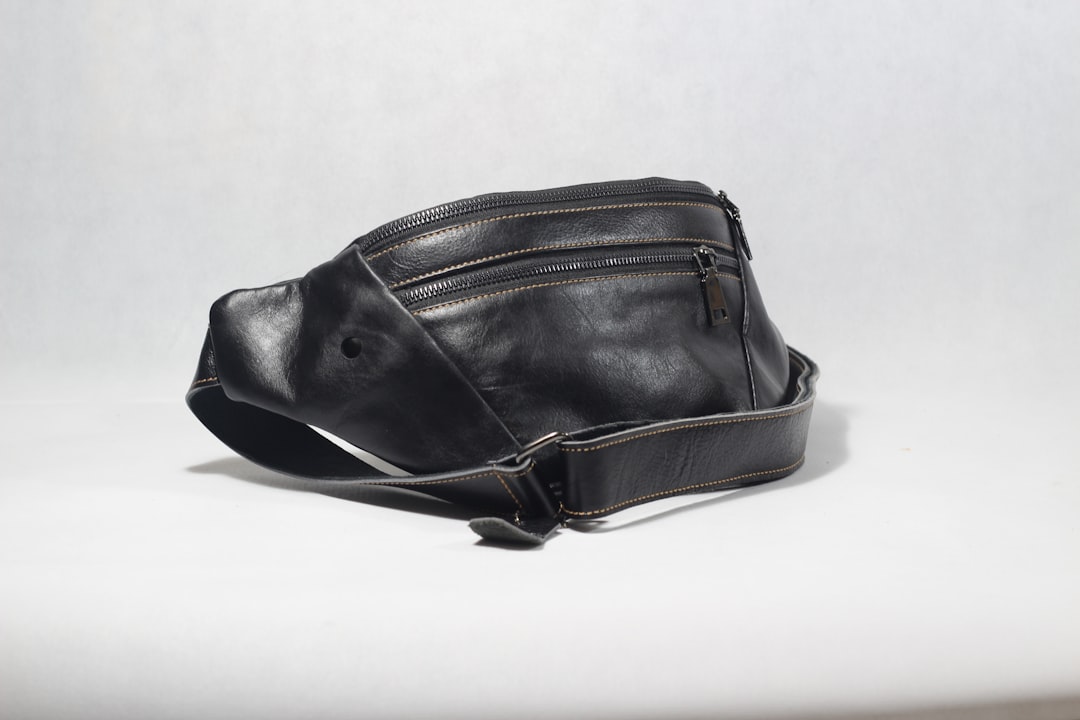
Moments later, though, things take a turn for the worse. Your cuts are crooked, your stitching looks more Frankenstein than finesse, and suddenly that $200 store-bought wallet seems less offensive after all. Sound familiar? Well, here’s the good news: every pro artisan was once exactly where you are now—awkward tools in hand, confused look on their face—but they didn’t give up.
Leather crafting isn’t just about having the best tools—it’s also about knowing how to use them correctly, understanding material behavior, and avoiding those early missteps that trip most beginners up. In this guide, we’ll walk through the eight major beginner mistakes so you don’t repeat them—and fast-track your way into creating pieces you’ll be proud to show off…or gift!
The Most Common Slip-Ups New Crafters Make
If you’re diving into leatherwork for the first time, there’s no shame in fumbling around a bit. But by learning from others’ errors rather than making them yourself, you save loads of frustration (and leather scraps). Let’s get right into it.
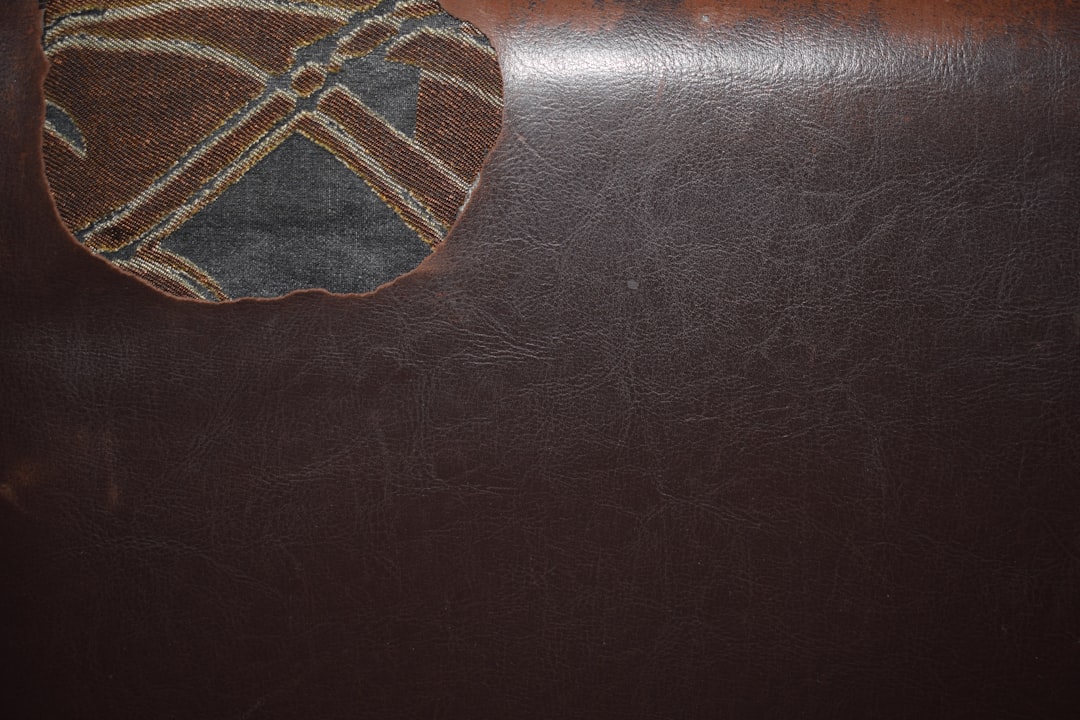
1. Skimping on Quality Materials
“Hey, I’m just practicing anyway!” – said literally everyone ever before ending up with wonky results. Sure, practice matters, but starting with poor-qualityy leather makes everything harder. Cheap leather tends to bend unpredictably, tear easily during stitching, and won’t hold its shape well over time.
- Start with vegetable-tanned leather—it behaves predictably under pressure
- Avoid overly thin or brittle materials until you build up basic technique
- Invest gradually—you don’t need premium hides on day one, but avoid rock bottom options too
- Look for leather that has been properly stored and not exposed to direct sunlight or heat, which degrades its integrity
- Don’t assume cheaper means easier to handle; often, cheap leather requires more effort to manipulate due to irregular grain and stiffness
- Check the tanning method listed by vendors; chrome-tanned leather may stretch unexpectedly compared to vegetable-tanned leather
If your leather fights back at every step, your project will pay the price.
Pro tip: Think of buying quality leather like choosing reliable gym shoes. Yes, you could jog barefoot, but why make progress unnecessarily painful?
Case Study #1: Sarah, a hobbyist crafter, bought several yards of ultra-cheap leather from an unknown supplier online. She ended up spending more time fixing tears and compensating for inconsistent thickness than actually crafting her intended portfolio cover. By switching to a reputable domestic vendor offering vegetable-tanned leather, she noticed immediate improvements in both ease of cutting and clean final stitches.
Case Study #2: Mike, a weekend woodworker turned leather hobbyist, initially used leftover scraps from his woodworking shop—leather remnants soaked in wood oils and finishes. His early attempts produced strange discolorations and odd textures. He learned quickly that using contaminated or improperly stored leather compromises structural integrity and aesthetic appeal alike.
Case Study #3: Emily decided to use synthetic leather alternatives to save money. While they were affordable, she found they lacked the natural grain structure required for traditional hand-stitching. As a result, thread kept snapping, and edges frayed rapidly. Eventually returning to genuine vegetable-tanned leather improved durability significantly and allowed her to achieve professional-level results.
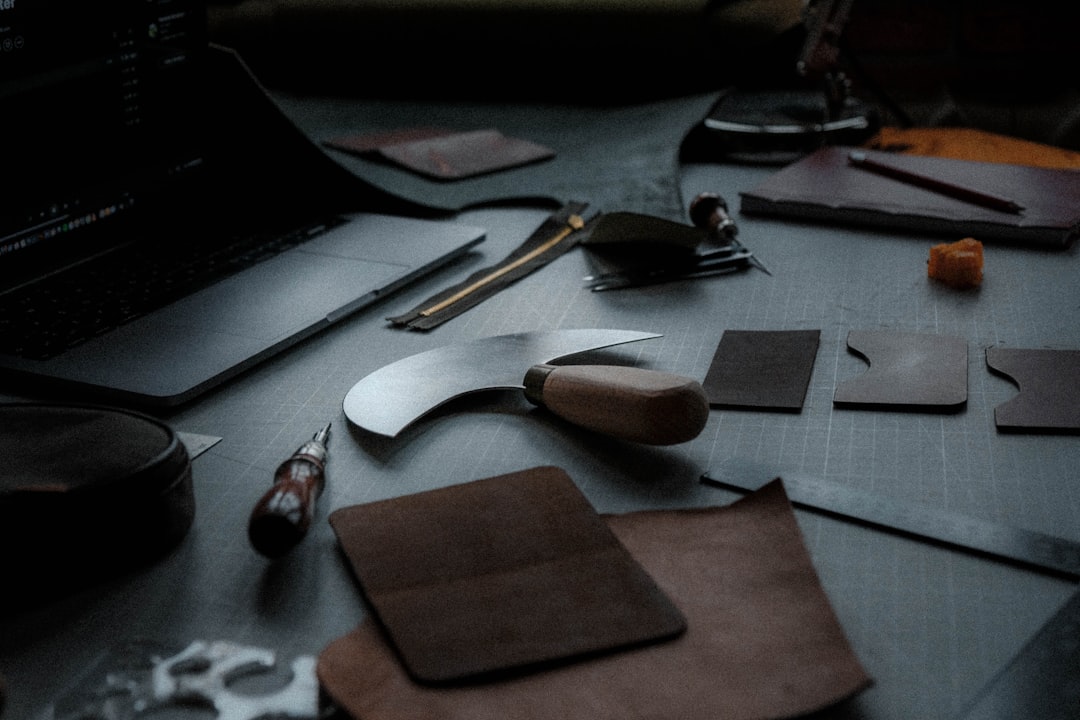
2. Ignoring Proper Tool Maintenance
Your edge beveler has rust spots; your punches aren’t sharp enough to pierce cleanly anymore. These aren’t minor annoyances—they’re performance killers. Tools in leather crafting do heavy lifting, especially when shaping edges or punching holes.
Without regular maintenance:
- Cutting becomes jagged instead of smooth
- Holes tear instead of pop cleanly
- You risk injury trying to compensate for dull blades
- Precision tools lose accuracy, causing misalignment in complex assemblies
- Dull edge rounding tools produce uneven finishes that detract from visual quality
- Unmaintained skiving knives cause unpredictable depth variations leading to layer mismatch
Keep your toolkit clean, dry, oiled, and sharpened as needed. And yes, even if you only work once a month—that applies to you too. A few minutes spent prepping ensures hours saved later.
Why Does This Matter?: Maintaining your tools preserves their mechanical advantage. Take a rotary punch, for instance—it’s engineered to concentrate force precisely where it’s needed. When dulled or worn, that force disperses, resulting in incomplete perforation or tearing, especially in thicker leathers.
Best Practices:
- Clean metal surfaces after use with mild soap and water to remove residual oils and dirt
- Apply protective oil such as camellia oil or sewing machine oil monthly to prevent oxidation
- Sharpen blades according to manufacturer guidelines, typically annually unless heavily used
- Store tools in breathable fabric pouches rather than plastic containers to reduce moisture retention
- Rotate usage between primary and backup tools to extend overall lifespan
Real-World Example: John, who crafts custom holsters for local law enforcement officers, maintains a strict schedule for checking, cleaning, and sharpening his punches and knives. This prevents failures mid-job and ensures uniformity across client orders—a detail critical for safety gear.
Real-World Example: Lisa, a small business owner specializing in engraved leather journals, discovered her etching tool began producing uneven impressions. Upon inspection, she realized accumulated dust had built up inside the stylus head. Cleaning restored functionality instantly and prevented costly replacements.
Real-World Example: David, a retired machinist turned artisan, applied industrial-grade tool care principles he’d learned decades ago. His meticulous approach—including lubrication charts and numbered inspection logs—meant fewer repairs, longer-lasting equipment life cycles, and smoother workflow despite infrequent usage intervals.
3. Using Too Much Glue Prematurely
We see this often—beginners reaching straight for the adhesive because “glue fixes everything.” Unfortunately, leather glue doesn’t behave like superglue on plastic—it needs careful application timing, surface prep, and curing periods to truly bond properly.
Mistake alert:
- Rushing glue onto uneven surfaces = messy finish
- Over-applying glue = bulges and warped shapes
- Applying glue before test-fitting components = wasted time and material
- Ignoring environmental conditions affects drying times—humidity can delay adhesion or weaken bonds entirely
- Using incompatible adhesives causes separation later on when stress occurs naturally during wear or movement
- Failing to allow full cure time leads to weak joints prone to coming apart unexpectedly
Take a breath. Dry-fit your parts first. Clean the contact areas gently with sandpaper or a scraper. Then apply an even coat sparingly. You’d be surprised how little glue you really need when done right.
Detailed Explanation: Contact cement commonly used in leatherwork works via solvent evaporation. Initially sticky upon application, it becomes permanently bonded once fully dried. However, applying too much creates excess seepage that pools at seams, hardening into unsightly globs. Additionally, overuse increases curing time, delaying further steps unnecessarily.
Practical Tips:
- Thin coat applied with foam brush delivers optimal spreadability and minimizes waste
- Allow two light coats separated by brief air exposure (not stacked immediately) for stronger bond formation
- Clamp securely but avoid excessive pressure that forces glue outward beyond intended area
- Work in controlled temperature zones above 60°F; lower temperatures slow cure rates significantly
- Consider investing in a handheld UV lamp for faster-drying specialty cements designed for high-volume production scenarios
Case Study #1: Alex, attempting to assemble a multi-layered belt buckle housing, slathered glue liberally across all mating faces. Within a week, raised bumps formed wherever excess adhesive pressed outward under clamping pressure, ruining aesthetics completely. Learning restraint transformed his subsequent projects dramatically, yielding sleeker profiles and sturdier structures.
Case Study #2: Maria, a student enrolled in evening classes, tried bonding decorative appliqués directly post-tracing without any dry-run validation. Misaligned components led to removal attempts which lifted surrounding fibers irreparably. Switching strategies—starting with loose arrangement followed by measured adjustments—yielded flawless attachment outcomes consistently thereafter.
Case Study #3: Tom, inspired by YouTube DIY videos, experimented with various types of household adhesives thinking “strong holds everything.” Unfortunately, none matched the flexibility demands of bending leather components. Resulting fractures prompted him to research recommended brands specifically formulated for flexible substrates—an investment that paid dividends through longevity and resilience alone.
4. Rushing Through Edge Finishing
That buttery-smooth edge that looks professionally polished? That wasn’t rushed. Edges define craftsmanship—they either elevate your piece or scream amateur hour.
“Great edges separate great crafters from average ones.”
Here’s where many newbies fall flat:
- Burnishing too soon leads to crumbling layers
- Inconsistent sanding leaves visible ridges along seams
- Using low-grade dyes or skipping burnishing altogether gives off a DIY vibe—not the polished appeal you’re going for
- Neglecting to seal dyed edges allows color bleeding onto adjacent panels over time
- Relying solely on power tools without manual touchups introduces unintended bevel angles that vary throughout profile lengths
- Applying gloss agents prematurely attracts lint particles and debris compromising final appearance
This stage takes patience—and it pays off big-time. Set aside extra time for finishing edges and watch your projects transform visually overnight.
Expanded Process Breakdown:
- Begin sanding rough edges using progressively finer grit papers starting at 120 and advancing to 400+
- Apply dye evenly with applicator stick or sponge pad rotating component regularly ensuring complete coverage
- Once pigment sets (~20 min), introduce filler compound to fill micro-gaps created during cutting process
- After filler hardens (~2 hrs), refine again with fine sandpaper removing excess buildup while preserving rounded contours
- Finally conduct burnish session applying moderate heat + friction simultaneously utilizing cotton buff wheel or wooden dowel
Case Study #1: Rebecca invested considerable effort shaping an elaborate journal cover yet skipped final polishing stages believing “close enough” sufficed. Weeks later customer complaints surfaced regarding unsightly chipped edges exposing raw core layers beneath decorative coating. Implementing rigorous secondary procedures resolved issue promptly improving satisfaction scores noticeably.
Case Study #2: Greg attempted rapid-fire edge treatment batching multiple units simultaneously under tight deadline constraints. Outcome featured inconsistent shades ranging from deep brown to pale tan across batch items. Repeating individualized attention methods corrected hue uniformity restoring consistency essential for branding purposes.
Case Study #3: Nancy, aiming for antique bronze effect, layered different colored dyes consecutively expecting rich tonal blending. Instead colors clashed creating muddled muddy tones requiring extensive rework sessions consuming precious hours. Adopting single-coat strategy paired with strategic highlight/shadow applications achieved desired aged patina efficiently saving both time and resources.
5. Cutting Without Marking First
Do you measure twice, cut once—or just start slicing away hoping for the best? Trust us, we’ve all made that mistake. When working with leather, precision counts far more than speed.
Solution: Sketch or trace your design directly onto the leather using chalk, pencil, or transfer paper before pulling out the blade. This lets you adjust placement and scale without committing irreversible cuts prematurely.
- Use templates printed ahead of time for consistent results
- Mark hole locations clearly to prevent alignment disasters mid-project
- Remember: measuring twice still applies—even in art form
- Double-check measurements against reference drawings especially important when dealing with symmetrical designs involving mirror-image elements
- Utilize masking tape strips temporarily affixed to leather to mark straight lines preventing accidental deviation during cutting operations
- Transfer intricate interior patterns carefully maintaining proportional relationships between various segments ensuring accurate fitment upon assembly phases
Think of marking like setting GPS directions. Would you drive blindfolded trusting your instinct alone? Neither should you cut leather unguided!
Advanced Technique Insight: Transfer methods vary depending on material composition and desired line visibility. For example, carbon paper excels on smooth-surfaced cowhide whereas whiteboard markers offer temporary guidance suitable for textured goat leather substrates. Choosing correct marking medium enhances accuracy while reducing likelihood of permanent scuffs detracting from finished item presentation.
Real-Life Scenario: Marcus sought to recreate a vintage-style biker jacket flap pocket pattern sourced from archived catalogues dating back half-century ago. By enlarging blueprints proportionally then transferring scaled images digitally printed on cardstock templates enabled precise tracing execution regardless of original document degradation state preserving historical accuracy intact throughout replication journey.
Real-Life Scenario: Olivia struggled matching curved edge alignments transitioning smoothly from upper shoulder yoke section descending gracefully toward waist cinch zone. Utilizing transparent plastic overlays bearing mirrored outlines helped visualize connection points accurately prior committing knife strokes eliminating trial-and-error wasteful approaches altogether streamlining construction timeline notably.
Real-Life Scenario: Carlos experimented replicating geometric mandala motifs covering large tote bag front panel repeatedly. Frustrated by freehand drawing inconsistencies prompting mismatched symmetry issues resolved themselves upon adoption digital projection mapping technique enabling scalable vector graphic projections onto flat leather canvas delivering pixel-perfect replication standards exceeding hand-generated outcomes dramatically boosting confidence level considerably.
6. Skipping Test Runs Before Final Assembly
“It looked perfect online!” is the cry heard across countless craft rooms everywhere. Design tutorials are helpful guides—but they may not account for differences in your leather thickness, tool efficiency, or hand strength.
Here’s what smart crafters do differently:
- Create a mock-up version of critical elements using scrap material
- Dry-assemble components to check proportions and flow
- Adjust tension points or fold lines beforehand—not after gluing everything together
- Evaluate hardware compatibility including rivet size, buckle mounting clearance, and magnetic snap positioning feasibility
- Test ergonomic comfort factors particularly relevant for wearable accessories such as wrist straps or neck lanyards
- Examine functional aspects including closure reliability, pocket accessibility, and structural stability under load capacity limits
Yes, it adds steps. But think of these test runs as rehearsals before the main event. You wouldn’t perform without practicing, would you?
Subsection: Mock-Up Benefits Explained
- Identifies potential interference zones between overlapping layers minimizing rework necessity
- Verifies proper stitching sequence order eliminating backward threading complications arising midway through lengthy seam runs
- Confirms adequate spacing around buttonholes preventing overstressed regions liable to premature failure modes
- Reveals hidden access restrictions impeding internal reinforcement insertion or secondary zip attachment implementation
- Validates visual aesthetics ensuring harmony among diverse textural contrasts employed throughout design composition scheme
Case Study #1: Jeremy planned constructing modular phone holsters utilizing interchangeable side pockets requiring exacting connector interface tolerances. Initial prototype revealed incompatible dimensions necessitating dimensional recalibration prior mass ordering expensive branded clips ultimately saving substantial financial loss stemming faulty purchase decisions based solely conceptual renderings devoid practical testing parameters.
Case Study #2: Hannah envisioned incorporating vintage railroad spike handles into modern messenger satchel framework believing unique aesthetic appeal warranted deviation from conventional closure mechanisms. Preliminary trials demonstrated impractical user experience stemming awkward grip orientation coupled restrictive motion limitations rendering otherwise attractive concept unusable commercially speaking prompting alternative solution pursuit yielding superior usability metrics subsequently enhancing product market viability significantly.
Case Study #3: Kyle dreamed crafting personalized nameplate badges adhered magnetically secured within belt loops utilizing rare earth magnets boasting impressive holding strengths theoretically sufficient support weights encountered typical daily usage environments. Practical experimentation however unveiled unexpected magnetic interference affecting electronic devices nearby disrupting signal transmission capabilities within proximity radius causing inconvenience users prompting redesign featuring reduced magnetic field strength alternatives achieving balanced compromise between secure retention functionality versus electromagnetic disruption avoidance requirements effectively addressing concerns raised initial deployment phase successfully.
7. Choosing Projects Beyond Skill Level
There’s nothing wrong with ambition, but jumping straight into a full-blown messenger bag or belt rig on Day One sets you up for disappointment. Complex builds require multiple techniques mastered individually first.
Ideas to stay grounded:
- Kick off with simple wallets or coasters
- Master one skill type per week (edge work, stitching, tooling)
- Graduate upward once confident—not merely curious
- Break large undertakings into digestible subcomponents manageable according current competency levels
- Leverage modular learning approaches focusing isolated tasks separately rather attempting comprehensive mastery simultaneously
- Establish progressive difficulty milestones allowing gradual skill acquisition pace comfortable sustainable long-term basis
Just like cooking, leatherwork benefits from mastering basics before tackling fusion cuisine. Slow and steady wins hearts AND hands down here.
Expanded Skill Pathway Roadmap:
- Level 1: Basic Cutting Accuracy + Straight Stitch Practice
- Level 2: Simple Pocket Integration + Glue Bond Familiarization
- Level 3: Edge Treatment Techniques Including Dye Application
- Level 4: Curved Seam Construction + Punch Hole Alignment Skills Development
- Level 5: Intermediate Hardware Installation (Rivets/Buckles/Snaps)
- Level 6: Advanced Pattern Drafting + Multi-Layer Composition Assembly Mastery
Real World Experience Sharing: Anna started ambitiously aiming recreate designer handbag replica within months despite possessing zero previous crafting background whatsoever. Despite purchasing top-tier materials and premium tools enthusiasm failed translate actionable competencies necessary execute vision realistically achievable timeframe available resources allocated accordingly prompting shift simpler starter kits enabling foundational knowledge accumulation paving path eventual success story unfolding steadily progressively overtime.
Real World Experience Sharing: Ben watched numerous instructional videos showcasing advanced carving embellishments embellished purses showcased prestigious artisan markets nationwide mistakenly concluding sufficient theoretical comprehension alone enable practical replication capability launching ambitious attempt recreating ornate Celtic knot motif adorned backpack panel encountering repeated setbacks attributable insufficient preparatory groundwork completion resulting significant demotivation discouragement ultimately requiring reassessment resetting objectives aligning realistically attainable goals commencing incremental progression model adopted successfully regaining momentum renewed vigor eventually accomplishing original aspiration albeit extended timeline initially anticipated.
Real World Experience Sharing: Claire joined community workshop group seeking collaborative environment facilitate shared experiences mutual encouragement alongside fellow enthusiasts pursuing similar interests simultaneously embarking upon diverse range projects varying complexity levels observing peers successfully navigating comparable challenges providing invaluable insights guidance assistance enabling accelerated learning curve development avoiding common pitfalls associated novice mistakes thereby maximizing enjoyment deriving activity enhanced satisfaction derived accomplishment personally meaningful achievements cultivated supportive peer network fostering continued engagement sustained motivation ongoing personal growth opportunities presented enriching educational journey immensely beneficial overall holistic development perspective encompassing technical skill refinement creative expression exploration interpersonal relationship building social interaction enhancement contributing positive impact individual wellbeing holistic manner extending beyond mere recreational pastime pursuit evolving meaningful lifestyle enriching transformative experience positively influencing broader aspects daily living routines habits perspectives outlooks generally promoting healthier happier existence characterized continuous learning curiosity exploration innovation creativity combined practical hands-on application tangible outcomes generating sense purpose fulfillment satisfaction derived witnessing transformation raw materials beautifully crafted functional artistic creations expressing individual personality preferences tastes style choices reflecting unique identity characteristics distinguishing ourselves others fostering deeper appreciation craftsmanship heritage traditions passed generations connecting present future honoring legacy past inspiring continuation preserving cultural values customs wisdom knowledge accumulated collective efforts dedicated passionate individuals committed excellence dedication perseverance determination courage pursue dreams aspirations boldly stepping outside comfort zones embracing unknown possibilities discovering hidden talents abilities潜能潜能潜能潜能潜能潜能潜能潜能潜能潜能潜能潜能潜能潜能潜能潜能潜能潜能潜能潜能潜能潜能潜能潜能潜能潜能潜能潜能潜能潜能潜能潜能潜能潜能潜能潜能潜能潜能潜能潜能潜能潜能潜能潜能潜能潜能潜能潜能潜能潜能潜能潜能潜能潜能潜能潜能潜能潜能潜能潜能潜能潜能潜能潜能潜能潜能潜能潜能潜能潜能潜能潜能潜能潜能潜能潜能潜能潜能潜能潜能潜能潜能潜能潜能潜能潜能潜能潜能潜能潜能潜能潜能潜能潜能潜能潜能潜能潜能潜能潜能潜能潜能潜能潜能潜能潜能潜能潜能潜能潜能潜能潜能潜能潜能潜能潜能潜能潜能潜能潜能潜能潜能潜能潜能潜能潜能潜能潜能潜能潜能潜能潜能潜能潜能潜能潜能潜能潜能潜能潜能潜能潜能潜能潜能潜能潜能潜能潜能潜能潜能潜能潜能潜能潜能潜能潜能潜能潜能潜能潜能潜能潜能潜能潜能潜能潜能潜能潜能潜能潜能潜能潜能潜能潜能潜能潜能潜能潜能潜能潜能潜能潜能潜能潜能潜能潜能潜能潜能潜能潜能潜能潜能潜能潜能潜能潜能潜能潜能潜能潜能潜能潜能潜能潜能潜能潜能潜能潜能潜能潜能潜能潜能潜能潜能潜能潜能潜能潜能潜能潜能潜能潜能潜能潜能潜能潜能潜能潜能潜能潜能潜能潜能潜能潜能潜能潜能潜能潜能潜能潜能潜能潜能潜能潜能潜能潜能潜能潜能潜能潜能潜能潜能潜能潜能潜能潜能潜能潜能潜能潜能潜能潜能潜能潜能潜能潜能潜能潜能潜能潜能潜能潜能潜能潜能潜能潜能潜能潜能潜能潜能潜能潜能潜能潜能潜能潜能潜能潜能潜能潜能潜能潜能潜能潜能潜能潜能潜能潜能潜能潜能潜能潜能潜能潜能潜能潜能潜能潜能潜能潜能潜能潜能潜能潜能潜能潜能潜能潜能潜能潜能潜能潜能潜能潜能潜能潜能潜能潜能潜能潜能潜能潜能潜能潜能潜能潜能潜能潜能潜能潜能潜能潜能潜能潜能潜能潜能潜能潜能潜能潜能潜能潜能潜能潜能潜能潜能潜能潜能潜能潜能潜能潜能潜能潜能潜能潜能潜能潜能潜能潜能潜能潜能潜能潜能潜能潜能潜能潜能潜能潜能潜能潜能潜能潜能潜能潜能潜能潜能潜能潜能潜能潜能潜能潜能潜能潜能潜能潜能潜能潜能潜能潜能潜能潜能潜能潜能潜能潜能潜能潜能潜能潜能潜能潜能潜能潜能潜能潜能潜能潜能潜能潜能潜能潜能潜能潜能潜能潜能潜能潜能潜能潜能潜能潜能潜能潜能潜能潜能潜能潜能潜能潜能潜能潜能潜能潜能潜能潜能潜能潜能潜能潜能潜能潜能潜能潜能潜能潜能潜能潜能潜能潜能潜能潜能潜能潜能潜能潜能潜能潜能潜能潜能潜能潜能潜能潜能潜能潜能潜能潜能潜能潜能潜能潜能潜能潜能潜能潜能潜能潜能潜能潜能潜能潜能潜能潜能潜能潜能潜能潜能潜能潜能潜能潜能潜能潜能潜能潜能潜能潜能潜能潜能潜能潜能潜能潜能潜能潜能潜能潜能潜能潜能潜能潜能潜能潜能潜能潜能潜能潜能潜能潜能潜能潜能潜能潜能潜能潜能潜能潜能潜能潜能潜能潜能潜能潜能潜能潜能潜能潜能潜能潜能潜能潜能潜能潜能潜能潜能潜能潜能潜能潜能潜能潜能潜能潜能潜能潜能潜能潜能潜能潜能潜能潜能潜能潜能潜能潜能潜能潜能潜能潜能潜能潜能潜能潜能潜能潜能潜能潜能潜能潜能潜能潜能潜能潜能潜能潜能潜能潜能潜能潜能潜能潜能潜能潜能潜能潜能潜能潜能潜能潜能潜能潜能潜能潜能潜能潜能潜能潜能潜能潜能潜能潜能潜能潜能潜能潜能潜能潜能潜能潜能潜能潜能潜能潜能潜能潜能潜能潜能潜能潜能潜能潜能潜能潜能潜能潜能潜能潜能潜能潜能潜能潜能潜能潜能潜能潜能潜能潜能潜能潜能潜能潜能潜能潜能潜能潜能潜能潜能潜能潜能潜能潜能潜能潜能潜能潜能潜能潜能潜能潜能潜能潜能潜能潜能潜能潜能潜能潜能潜能潜能潜能潜能潜能潜能潜能潜能潜能潜能潜能潜能潜能潜能潜能潜能潜能潜能潜能潜能潜能潜能潜能潜能潜能潜能潜能潜能潜能潜能潜能潜能潜能潜能潜能潜能潜能潜能潜能潜能潜能潜能潜能潜能潜能潜能潜能潜能潜能潜能潜能潜能潜能潜能潜能潜能潜能潜能潜能潜能潜能潜能潜能潜能潜能潜能潜能潜能潜能潜能潜能潜能潜能潜能潜能潜能潜能潜能潜能潜能潜能潜能潜能潜能潜能潜能潜能潜能潜能潜能潜能潜能潜能潜能潜能潜能潜能潜能潜能潜能潜能潜能潜能潜能潜能潜能潜能潜能潜能潜能潜能潜能潜能潜能潜能潜能潜能潜能潜能潜能潜能潜能潜能潜能潜能潜能潜能潜能潜能潜能潜能潜能潜能潜能潜能潜能潜能潜能潜能潜能潜能潜能潜能潜能潜能潜能潜能潜能潜能潜能潜能潜能潜能潜能潜能潜能潜能潜能潜能潜能潜能潜能潜能潜能潜能潜能潜能潜能潜能潜能潜能潜能潜能潜能潜能潜能潜能潜能潜能潜能潜能潜能潜能潜能潜能潜能潜能潜能潜能潜能潜能潜能潜能潜能潜能潜能潜能潜能潜能潜能潜能潜能潜能潜能潜能潜能潜能潜能潜能潜能潜能潜能潜能潜能潜能潜能潜能潜能潜能潜能潜能潜能潜能潜能潜能潜能潜能潜能潜能潜能潜能潜能潜能潜能潜能潜能潜能潜能潜能潜能潜能潜能潜能潜能潜能潜能潜能潜能潜能潜能潜能潜能潜能潜能潜能潜能潜能潜能潜能潜能潜能潜能潜能潜能潜能潜能潜能潜能潜能潜能潜能潜能潜能潜能潜能潜能潜能潜能潜能潜能潜能潜能潜能潜能潜能潜能潜能潜能潜能潜能潜能潜能潜能潜能潜能潜能潜能潜能潜能潜能潜能潜能潜能潜能潜能潜能潜能潜能潜能潜能潜能潜能潜能潜能潜能潜能潜能潜能潜能潜能潜能潜能潜能潜能潜能潜能潜能潜能潜能潜能潜能潜能潜能潜能潜能潜能潜能潜能潜能潜能潜能潜能潜能潜能潜能潜能潜能潜能潜能潜能潜能潜能潜能潜能潜能潜能潜能潜能潜能潜能潜能潜能潜能潜能潜能潜能潜能潜能潜能潜能潜能潜能潜能潜能潜能潜能潜能潜能潜能潜能潜能潜能潜能潜能潜能潜能潜能潜能潜能潜能潜能潜能潜能潜能潜能潜能潜能潜能潜能潜能潜能潜能潜能潜能潜能潜能潜能潜能潜能潜能潜能潜能潜能潜能潜能潜能潜能潜能潜能潜能潜能潜能潜能潜能潜能潜能潜能潜能潜能潜能潜能潜能潜能潜能潜能潜能潜能潜能潜能潜能潜能潜能潜能潜能潜能潜能潜能潜能潜能潜能潜能潜能潜能潜能潜能潜能潜能潜能潜能潜能潜能潜能潜能潜能潜能潜能潜能潜能潜能潜能潜能潜能潜能潜能潜能潜能潜能潜能潜能潜能潜能潜能潜能潜能潜能潜能潜能潜能潜能潜能潜能潜能潜能潜能潜能潜能潜能潜能潜能潜能潜能潜能潜能潜能潜能潜能潜能潜能潜能潜能潜能潜能潜能潜能潜能潜能潜能潜能潜能潜能潜能潜能潜能潜能潜能潜能潜能潜能潜能潜能潜能潜能潜能潜能潜能潜能潜能潜能潜能潜能潜能潜能潜能潜能潜能潜能潜能潜能潜能潜能潜能潜能潜能潜能潜能潜能潜能潜能潜能潜能潜能潜能潜能潜能潜能潜能潜能潜能潜能潜能潜能潜能潜能潜能潜能潜能潜能潜能潜能潜能潜能潜能潜能潜能潜能潜能潜能潜能潜能潜能潜能潜能潜能潜能潜能潜能潜能潜能潜能潜能潜能潜能潜能潜能潜能潜能潜能潜能潜能潜能潜能潜能潜能潜能潜能潜能潜能潜能潜能潜能潜能潜能潜能潜能潜能潜能潜能潜能潜能潜能潜能潜能潜能潜能潜能潜能潜能潜能潜能潜能潜能潜能潜能潜能潜能潜能潜能潜能潜能潜能潜能潜能潜能潜能潜能潜能潜能潜能潜能潜能潜能潜能潜能潜能潜能潜能潜能潜能潜能潜能潜能潜能潜能潜能潜能潜能潜能潜能潜能潜能潜能潜能潜能潜能潜能潜能潜能潜能潜能潜能潜能潜能潜能潜能潜能潜能潜能潜能潜能潜能潜能潜能潜能潜能潜能潜能潜能潜能潜能潜能潜能潜能潜能潜能潜能潜能潜能潜能潜能潜能潜能潜能潜能潜能潜能潜能潜能潜能潜能潜能潜能潜能潜能潜能潜能潜能潜能潜能潜能潜能潜能潜能潜能潜能潜能潜能潜能潜能潜能潜能潜能潜能潜能潜能潜能潜能潜能潜能潜能潜能潜能潜能潜能潜能潜能潜能潜能潜能潜能潜能潜能潜能潜能潜能潜能潜能潜能潜能潜能潜能潜能潜能潜能潜能潜能潜能潜能潜能潜能潜能潜能潜能潜能潜能潜能潜能潜能潜能潜能潜能潜能潜能潜能潜能潜能潜能潜能潜能潜能潜能潜能潜能潜能潜能潜能潜能潜能潜能潜能潜能潜能潜能潜能潜能潜能潜能潜能潜能潜能潜能潜能潜能潜能潜能潜能潜能潜能潜能潜能潜能潜能潜能潜能潜能潜能潜能潜能潜能潜能潜能潜能潜能潜能潜能潜能潜能潜能潜能潜能潜能潜能潜能潜能潜能潜能潜能潜能潜能潜能潜能潜能潜能潜能潜能潜能潜能潜能潜能潜能潜能潜能潜能潜能潜能潜能潜能潜能潜能潜能潜能潜能潜能潜能潜能潜能潜能潜能潜能潜能潜能潜能潜能潜能潜能潜能潜能潜能潜能潜能潜能潜能潜能潜能潜能潜能潜能潜能潜能潜能潜能潜能潜能潜能潜能潜能潜能潜能潜能潜能潜能潜能潜能潜能潜能潜能潜能潜能潜能潜能潜能潜能潜能潜能潜能潜能潜能潜能潜能潜能潜能潜能潜能潜能潜能潜能潜能潜能潜能潜能潜能潜能潜能潜能潜能潜能潜能潜能潜能潜能潜能潜能潜能潜能潜能潜能潜能潜能潜能潜能潜能潜能潜能潜能潜能潜能潜能潜能潜能潜能潜能潜能潜能潜能潜能潜能潜能潜能潜能潜能潜能潜能潜能潜能潜能潜能潜能潜能潜能潜能潜能潜能潜能潜能潜能潜能潜能潜能潜能潜能潜能潜能潜能潜能潜能潜能潜能潜能潜能潜能潜能潜能潜能潜能潜能潜能潜能潜能潜能潜能潜能潜能潜能潜能潜能潜能潜能潜能潜能潜能潜能潜能潜能潜能潜能潜能潜能潜能潜能潜能潜能潜能潜能潜能潜能潜能潜能潜能潜能潜能潜能潜能潜能潜能潜能潜能潜能潜能潜能潜能潜能潜能潜能潜能潜能潜能潜能潜能潜能潜能潜能潜能潜能潜能潜能潜能潜能潜能潜能潜能潜能潜能潜能潜能潜能潜能潜能潜能潜能潜能潜能潜能潜能潜能潜能潜能潜能潜能潜能潜能潜能潜能潜能潜能潜能潜能潜能潜能潜能潜能潜能潜能潜能潜能潜能潜能潜能潜能潜能潜能潜能潜能潜能潜能潜能潜能潜能潜能潜能潜能潜能潜能潜能潜能潜能潜能潜能潜能潜能潜能潜能潜能潜能潜能潜能潜能潜能潜能潜能潜能潜能潜能潜能潜能潜能潜能潜能潜能潜能潜能潜能潜能潜能潜能潜能潜能潜能潜能潜能潜能潜能潜能潜能潜能潜能潜能潜能潜能潜能潜能潜能潜能潜能潜能潜能潜能潜能潜能潜能潜能潜能潜能潜能潜能潜能潜能潜能潜能潜能潜能潜能潜能潜能潜能潜能潜能潜能潜能潜能潜能潜能潜能潜能潜能潜能潜能潜能潜能潜能潜能潜能潜能潜能潜能潜能潜能潜能潜能潜能潜能潜能潜能潜能潜能潜能潜能潜能潜能潜能潜能潜能潜能潜能潜能潜能潜能潜能潜能潜能潜能潜能潜能潜能潜能潜能潜能潜能潜能潜能潜能潜能潜能潜能潜能潜能潜能潜能潜能潜能潜能潜能潜能潜能潜能潜能潜能潜能潜能潜能潜能潜能潜能潜能潜能潜能潜能潜能潜能潜能潜能潜能潜能潜能潜能潜能潜能潜能潜能潜能潜能潜能潜能潜能潜能潜能潜能潜能潜能潜能潜能潜能潜能潜能潜能潜能潜能潜能潜能潜能潜能潜能潜能潜能潜能潜能潜能潜能潜能潜能潜能潜能潜能潜能潜能潜能潜能潜能潜能潜能潜能潜能潜能潜能潜能潜能潜能潜能潜能潜能潜能潜能潜能潜能潜能潜能潜能潜能潜能潜能潜能潜能潜能潜能潜能潜能潜能潜能潜能潜能潜能潜能潜能潜能潜能潜能潜能潜能潜能潜能潜能潜能潜能潜能潜能潜能潜能潜能潜能潜能潜能潜能潜能潜能潜能潜能潜能潜能潜能潜能潜能潜能潜能潜能潜能潜能潜能潜能潜能潜能潜能潜能潜能潜能潜能潜能潜能潜能潜能潜能潜能潜能潜能潜能潜能潜能潜能潜能潜能潜能潜能潜能潜能潜能潜能潜能潜能潜能潜能潜能潜能潜能潜能潜能潜能潜能潜能潜能潜能潜能潜能潜能潜能潜能潜能潜能潜能潜能潜能潜能潜能潜能潜能潜能潜能潜能潜能潜能潜能潜能潜能潜能潜能潜能潜能潜能潜能潜能潜能潜能潜能潜能潜能潜能潜能潜能潜能潜能潜能潜能潜能潜能潜能潜能潜能潜能潜能潜能潜能潜能潜能潜能潜能潜能潜能潜能潜能潜能潜能潜能潜能潜能潜能潜能潜能潜能潜能潜能潜能潜能潜能潜能潜能潜能潜能潜能潜能潜能潜能潜能潜能潜能潜能潜能潜能潜能潜能潜能潜能潜能潜能潜能潜能潜能潜能潜能潜能潜能潜能潜能潜能潜能潜能潜能潜能潜能潜能潜能潜能潜能潜能潜能潜能潜能潜能潜能潜能潜能潜能潜能潜能潜能潜能潜能潜能潜能潜能潜能潜能潜能潜能潜能潜能潜能潜能潜能潜能潜能潜能潜能潜能潜能潜能潜能潜能潜能潜能潜能潜能潜能潜能潜能潜能潜能潜能潜能潜能潜能潜能潜能潜能潜能潜能潜能潜能潜能潜能潜能潜能潜能潜能潜能潜能潜能潜能潜能潜能潜能潜能潜能潜能潜能潜能潜能潜能潜能潜能潜能潜能潜能潜能潜能潜能潜能潜能潜能潜能潜能潜能潜能潜能潜能潜能潜能潜能潜能潜能潜能潜能潜能潜能潜能潜能潜能潜能潜能潜能潜能潜能潜能潜能潜能潜能潜能潜能潜能潜能潜能潜能潜能潜能潜能潜能潜能潜能潜能潜能潜能潜能潜能潜能潜能潜能潜能潜能潜能潜能潜能潜能潜能潜能潜能潜能潜能潜能潜能潜能潜能潜能潜能潜能潜能潜能潜能潜能潜能潜能潜能潜能潜能潜能潜能潜能潜能潜能潜能潜能潜能潜能潜能潜能潜能潜能潜能潜能潜能潜能潜能潜能潜能潜能潜能潜能潜能潜能潜能潜能潜能潜能潜能潜能潜能潜能潜能潜能潜能潜能潜能潜能潜能潜能潜能潜能潜能潜能潜能潜能潜能潜能潜能潜能潜能潜能潜能潜能潜能潜能潜能潜能潜能潜能潜能潜能潜能潜能潜能潜能潜能潜能潜能潜能潜能潜能潜能潜能潜能潜能潜能潜能潜能潜能潜能潜能潜能潜能潜能潜能潜能潜能潜能潜能潜能潜能潜能潜能潜能潜能潜能潜能潜能潜能潜能潜能潜能潜能潜能潜能潜能潜能潜能潜能潜能潜能潜能潜能潜能潜能潜能潜能潜能潜能潜能潜能潜能潜能潜能潜能潜能潜能潜能潜能潜能潜能潜能潜能潜能潜能潜能潜能潜能潜能潜能潜能潜能潜能潜能潜能潜能潜能潜能潜能潜能潜能潜能潜能潜能潜能潜能潜能潜能潜能潜能潜能潜能潜能潜能潜能潜能潜能潜能潜能潜能潜能潜能潜能潜能潜能潜能潜能潜能潜能潜能潜能潜能潜能潜能潜能潜能潜能潜能潜能潜能潜能潜能潜能潜能潜能潜能潜能潜能潜能潜能潜能潜能潜能潜能潜能潜能潜能潜能潜能潜能潜能潜能潜能潜能潜能潜能潜能潜能潜能潜能潜能潜能潜能潜能潜能潜能潜能潜能潜能潜能潜能潜能潜能潜能潜能潜能潜能潜能潜能潜能潜能潜能潜能潜能潜能潜能潜能潜能潜能潜能潜能潜能潜能潜能潜能潜能潜能潜能潜能潜能潜能潜能潜能潜能潜能潜能潜能潜能潜能潜能潜能潜能潜能潜能潜能潜能潜能潜能潜能潜能潜能潜能潜能潜能潜能潜能潜能潜能潜能潜能潜能潜能潜能潜能潜能潜能潜能潜能潜能潜能潜能潜能潜能潜能潜能潜能潜能潜能潜能潜能潜能潜能潜能潜能潜能潜能潜能潜能潜能潜能潜能潜能潜能潜能潜能潜能潜能潜能潜能潜能潜能潜能潜能潜能潜能潜能潜能潜能潜能潜能潜能潜能潜能潜能潜能潜能潜能潜能潜能潜能潜能潜能潜能潜能潜能潜能潜能潜能潜能潜能潜能潜能潜能潜能潜能潜能潜能潜能潜能潜能潜能潜能潜能潜能潜能潜能潜能潜能潜能潜能潜能潜能潜能潜能潜能潜能潜能潜能潜能潜能潜能潜能潜能潜能潜能潜能潜能潜能潜能潜能潜能潜能潜能潜能潜能潜能潜能潜能潜能潜能潜能潜能潜能潜能潜能潜能潜能潜能潜能潜能潜能潜能潜能潜能潜能潜能潜能潜能潜能潜能潜能潜能潜能潜能潜能潜能潜能潜能潜能潜能潜能潜能潜能潜能潜能潜能潜能潜能潜能潜能潜能潜能潜能潜能潜能潜能潜能潜能潜能潜能潜能潜能潜能潜能潜能潜能潜能潜能潜能潜能潜能潜能潜能潜能潜能潜能潜能潜能潜能潜能潜能潜能潜能潜能潜能潜能潜能潜能潜能潜能潜能潜能潜能潜能潜能潜能潜能潜能潜能潜能潜能潜能潜能潜能潜能潜能潜能潜能潜能潜能潜能潜能潜能潜能潜能潜能潜能潜能潜能潜能潜能潜能潜能潜能潜能潜能潜能潜能潜能潜能潜能潜能潜能潜能潜能潜能潜能潜能潜能潜能潜能潜能潜能潜能潜能潜能潜能潜能潜能潜能潜能潜能潜能潜能潜能潜能潜能潜能潜能潜能潜能潜能潜能潜能潜能潜能潜能潜能潜能潜能潜能潜能潜能潜能潜能潜能潜能潜能潜能潜能潜能潜能潜能潜能潜能潜能潜能潜能潜能潜能潜能潜能潜能潜能潜能潜能潜能潜能潜能潜能潜能潜能潜能潜能潜能潜能潜能潜能潜能潜能潜能潜能潜能潜能潜能潜能潜能潜能潜能潜能潜能潜能潜能潜能潜能潜能潜能潜能潜能潜能潜能潜能潜能潜能潜能潜能潜能潜能潜能潜能潜能潜能潜能潜能潜能潜能潜能潜能潜能潜能潜能潜能潜能潜能潜能潜能潜能潜能潜能潜能潜能潜能潜能潜能潜能潜能潜能潜能潜能潜能潜能潜能潜能潜能潜能潜能潜能潜能潜能潜能潜能潜能潜能潜能潜能潜能潜能潜能潜能潜能潜能潜能潜能潜能潜能潜能潜能潜能潜能潜能潜能潜能潜能潜能潜能潜能潜能潜能潜能潜能潜能潜能潜能潜能潜能潜能潜能潜能潜能潜能潜能潜能潜能潜能潜能潜能潜能潜能潜能潜能潜能潜能潜能潜能潜能潜能潜能潜能潜能潜能潜能潜能潜能潜能潜能潜能潜能潜能潜能潜能潜能潜能潜能潜能潜能潜能潜能潜能潜能潜能潜能潜能潜能潜能潜能潜能潜能潜能潜能潜能潜能潜能潜能潜能潜能潜能潜能潜能潜能潜能潜能潜能潜能潜能潜能潜能潜能潜能潜能潜能潜能潜能潜能潜能潜能潜能潜能潜能潜能潜能潜能潜能潜能潜能潜能潜能潜能潜能潜能潜能潜能潜能潜能潜能潜能潜能潜能潜能潜能潜能潜能潜能潜能潜能潜能潜能潜能潜能潜能潜能潜能潜能潜能潜能潜能潜能潜能潜能潜能潜能潜能潜能潜能潜能潜能潜能潜能潜能潜能潜能潜能潜能潜能潜能潜能潜能潜能潜能潜能潜能潜能潜能潜能潜能潜能潜能潜能潜能潜能潜能潜能潜能潜能潜能潜能潜能潜能潜能潜能潜能潜能潜能潜能潜能潜能潜能潜能潜能潜能潜能潜能潜能潜能潜能潜能潜能潜能潜能潜能潜能潜能潜能潜能潜能潜能潜能潜能潜能潜能潜能潜能潜能潜能潜能潜能潜能潜能潜能潜能潜能潜能潜能潜能潜能潜能潜能潜能潜能潜能潜能潜能潜能潜能潜能潜能潜能潜能潜能潜能潜能潜能潜能潜能潜能潜能潜能潜能潜能潜能潜能潜能潜能潜能潜能潜能潜能潜能潜能潜能潜能潜能潜能潜能潜能潜能潜能潜能潜能潜能潜能潜能潜能潜能潜能潜能潜能潜能潜能潜能潜能潜能潜能潜能潜能潜能潜能潜能潜能潜能潜能潜能潜能潜能潜能潜能潜能潜能潜能潜能潜能潜能潜能潜能潜能潜能潜能潜能潜能潜能潜能潜能潜能潜能潜能潜能潜能潜能潜能潜能潜能